WordPressの無料テーマ「Cocoon(コクーン)」。
それを使って、私が当サイト「HARU channel」をどのようにカスタマイズしてきたのか、その過程をご紹介しています。
引き続き、コーディング(CSS)を使ったカスタマイズについて説明します。
(紹介するコードは、全てコピペして使用していただいて構いません。)
前回は、以下の状態まで進みました。
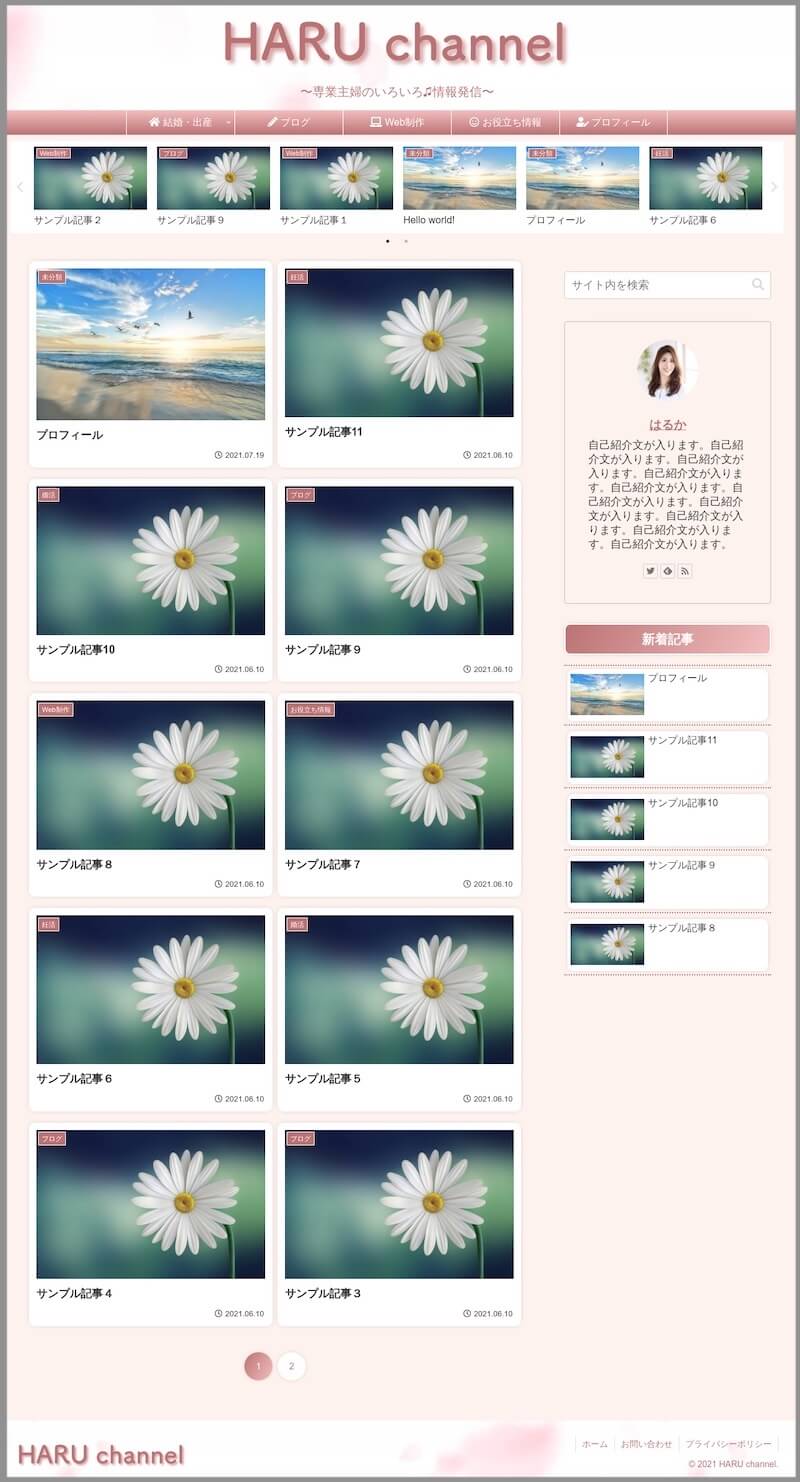
これを最終的に、以下の状態にまでカスタマイズしていきます。
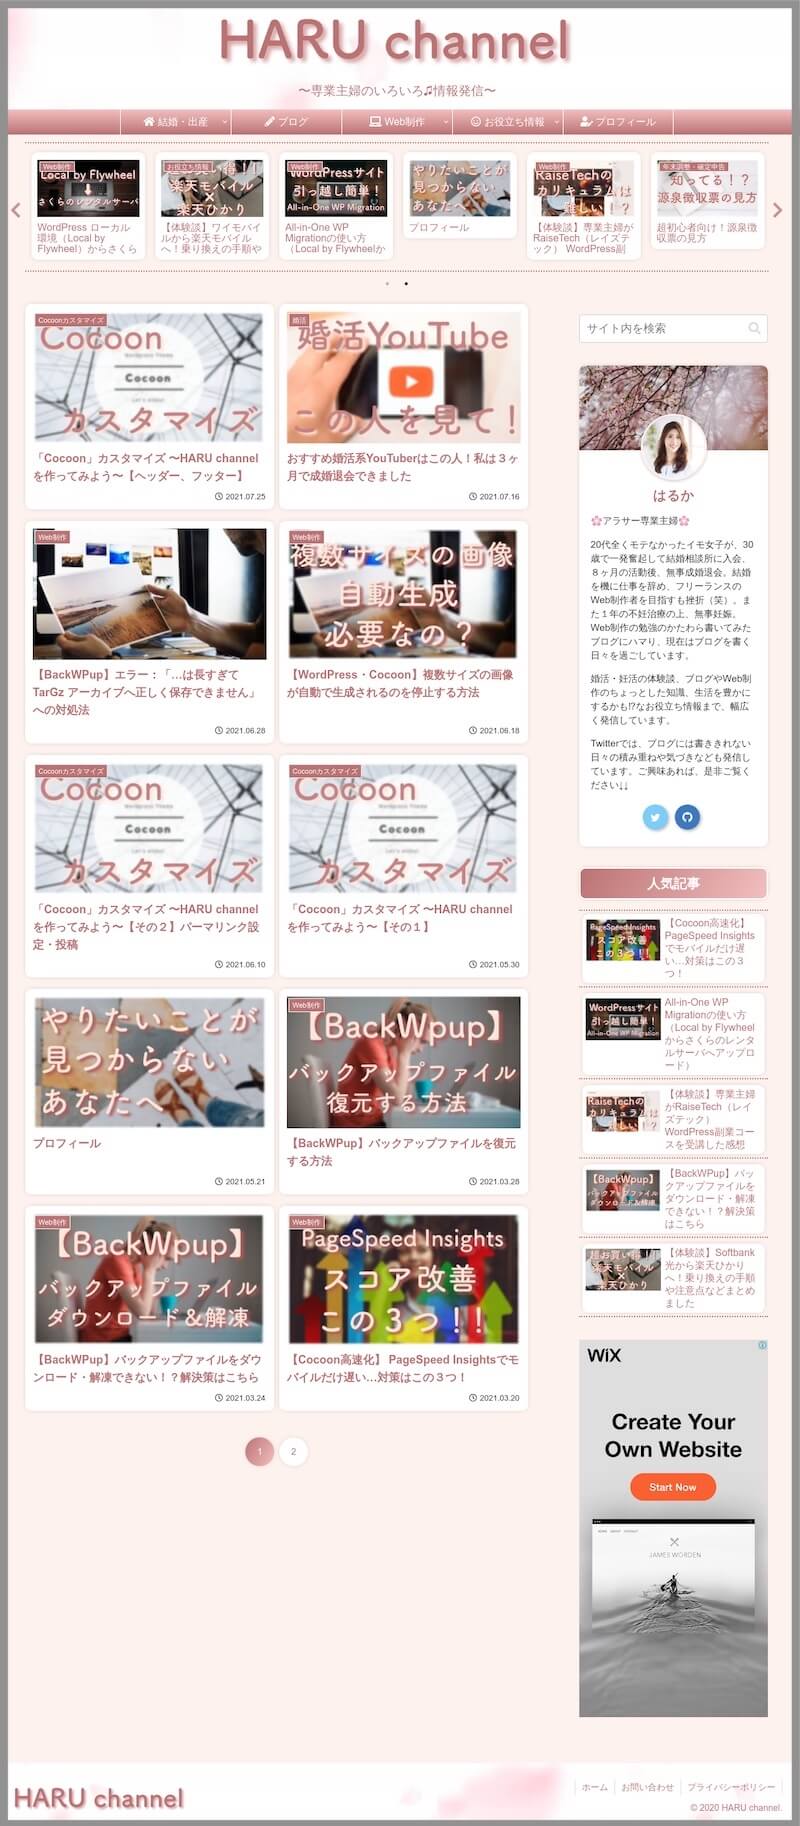
今回は、
- プロフィールボックス
のCSSのカスタマイズについて、説明していきます。
(CSSの入力箇所が分からない方は、こちらをご覧ください。)
カスタマイズ全体像
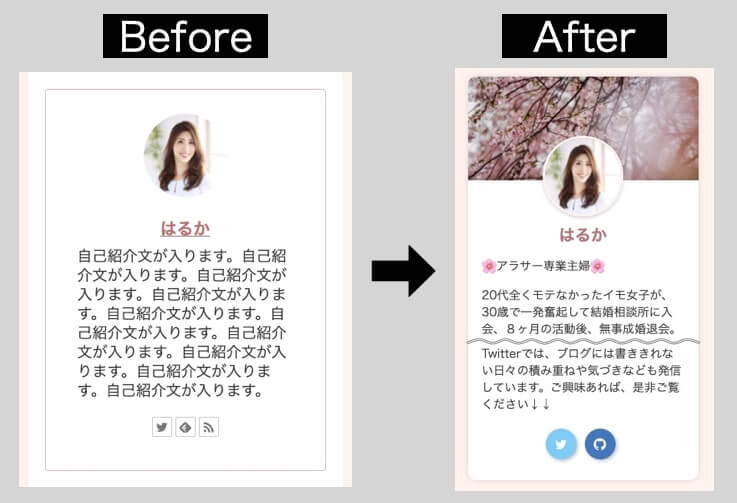
デフォルトのままだと、シンプルすぎて少し味気ない感じがするので…。
背景画像を入れるなどして、有料テーマ風の華やかな印象に。
「SANGO」というテーマがこのようなプロフィールボックスのようですね。
主な変更点は以下の通り。
- プロフィールボックスをカード型に
- 背景画像の挿入
- テキスト部分 文字サイズなどのカスタマイズ
- SNSボタン 形や色などのカスタマイズ
CSSはこちらです↓↓
/************************************
** プロフィールボックス
************************************/
/* ↓↓ボックスをカード型に */
.author-box {
  border-radius: 10px;
  box-shadow: 0 0 10px -5px rgba(0, 0, 0, 0.5);
  background: white;
  padding: 0 !important;
  border: 0;
}
/* ↑↑ボックスをカード型に */


/* ↓↓背景画像・プロフィール写真 */
/* ↓背景画像の挿入 */
.author-box figure.author-thumb {
  position: relative;
  float: none;
  width: 100% !important;
  height: 0;
  margin: 0 !important;
  padding-top: 45%;
  border-top-left-radius: 10px;
  border-top-right-radius: 10px;
  background: url(images/profile-background.jpg) center no-repeat;
  background-size: cover;
  text-align: center;
}
/* ↑背景画像の挿入 */

/* ↓プロフィール写真 */
.author-box figure.author-thumb img {
  position: absolute;
  left: 0;
  right: 0;
  bottom: -35%;
  width: 35%;
  max-width: 200px;
  margin: 0 auto;
  border: 3px solid #fdf2ed;
  box-shadow: 0 2px 5px 0 rgba(0, 0, 0, 0.2);
}
/* ↑プロフィール写真 */
/* ↑↑背景画像・プロフィール写真 */


/* ↓↓テキスト部分・SNSボタン */
.author-box .author-content {
  margin-top: 13% !important;
}

/*↓作者名(「はるか」の部分) */
.author-box .author-content .author-name {
  text-align: center;
  font-size: 1.3rem;
}

.author-box .author-content .author-name a {
  text-decoration: none;
}

.author-box .author-content .author-name a:hover {
  text-decoration: underline;
}
/*↑作者名(「はるか」の部分) */

/*↓プロフィール文 */
.author-box .author-content .author-description p {
  max-width: 500px;
  margin: 1em auto;
  line-height: 1.5 !important;
  font-size: 85%;
}
/*↑プロフィール文 */

/* ↓SNSボタン 形など*/
.author-box .author-follows .sns-buttons a.follow-button {
  border-radius: 50%;
  box-shadow: 2px 2px 5px 0 rgba(0, 0, 0, 0.3);
  width: 40px;
  height: 40px;
  margin-bottom: .5em;
  margin-right: .5em;
  border: none;
  color: white;
}
/* ↑SNSボタン 形など*/

/* ↓マウスオーバー時の動き */
.author-box .author-follows .sns-buttons a.follow-button:hover {
  box-shadow: 0;
  transform: translateY(-2px);
  transition: all .3s ease;
}
/* ↑マウスオーバー時の動き */

/* ↓SNSボタン 中のアイコン */
.author-box .author-follows .sns-buttons a.follow-button span {
  line-height: 40px;
}

.author-box .author-follows .sns-buttons a.follow-button span::before {
  font-size: 20px !important;
}
/* ↑SNSボタン 中のアイコン */


/* ↓SNSボタン 背景色 */
.author-box .bc-brand-color.sns-follow .twitter-button {
  background-color: #7dcdf7 !important;
}

.author-box .bc-brand-color.sns-follow .github-button {
  background-color: #4078c0 !important;
}

.author-box .bc-brand-color.sns-follow .facebook-button {
  background-color: #7c9dec !important;
}

.author-box .bc-brand-color.sns-follow .hatebu-button {
  background-color: #2c6ebd !important;
}

.author-box .bc-brand-color.sns-follow .instagram-button {
  background: linear-gradient(135deg, #427eff 0%, #f13f79 80%) no-repeat !important;
}

.author-box .bc-brand-color.sns-follow .line-button {
  background-color: #00c300 !important;
}

.author-box .bc-brand-color.sns-follow .website-button {
  background-color: #6eb6fd !important;
}

.author-box .bc-brand-color.sns-follow .youtube-button {
  background-color: #cd201f !important;
}
/* ↑SNSボタン 背景色 */

/* ↓デフォルトで表示される「Feedly」ボタンと「RSS」ボタンを非表示 */
.author-box .bc-brand-color.sns-follow .feedly-button, .author-box .bc-brand-color.sns-follow .rss-button {
  display: none;
}

/* ↑↑テキスト部分・SNSボタン */
以下、カスタマイズ方法の詳細を、上から順番に解説していきます。
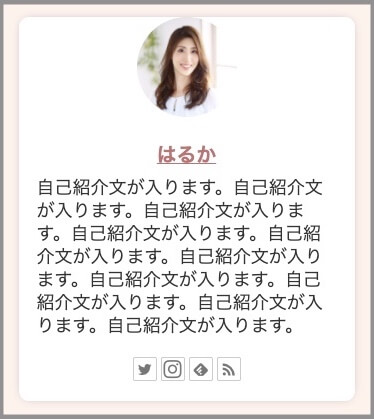
プロフィールボックスをカード型に
/* ↓↓ボックスをカード型に */
.author-box {
  border-radius: 10px;
  box-shadow: 0 0 10px -5px rgba(0, 0, 0, 0.5);
  background: white;
  padding: 0 !important;
  border: 0;
}
/* ↑↑ボックスをカード型に */記事一覧のカスタマイズ記事の「2.2 カードの背景を白く、角を丸くして、影をつける」とほぼ同じカスタマイズをしています。
6行目「padding: 0;」で、ボックス内の余白も狭くしていますね。
背景画像・プロフィール写真のカスタマイズ
背景画像の挿入
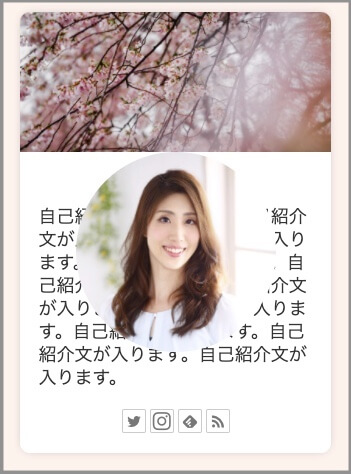
/* ↓背景画像の挿入 */
.author-box figure.author-thumb {
  position: relative;
  float: none;
  width: 100% !important;
  height: 0;
  margin: 0 !important;
  padding-top: 45%;
  border-top-left-radius: 10px;
  border-top-right-radius: 10px;
  background: url(images/profile-background.jpg) center no-repeat;
  background-size: cover;
  text-align: center;
}
/* ↑背景画像の挿入 */●11行目「background: url(images/profile-background.jpg);」
…背景画像を挿入します。(「imagesフォルダ」の「profile-background.jpg」という画像を背景として設定します)
●12行目「background-size: cover;」
…画像の縦横比は維持したまま、要素をちょうどよく覆うサイズにしてくれます。
背景画像の設定方法については、ヘッダー・フッターのカスタマイズ記事の「3.1 背景画像の設定」で説明していますので、必要な方はそちらをご覧ください。
●5行目「width: 100%;」〜8行目「padding-top: 45%;」
プロフィールボックスの幅いっぱいに、背景画像を表示することができました。
●9・10行目「border-top-left(/right)-radius: 10px;」
画像の上側の左右の角を丸くします。
プロフィール写真
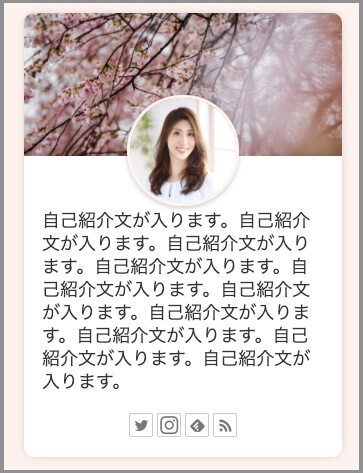
/* ↓プロフィール写真 */
.author-box figure.author-thumb img {
  position: absolute;
  left: 0;
  right: 0;
  bottom: -35%;
  width: 35%;
  max-width: 200px;
  margin: 0 auto;
  border: 3px solid #fdf2ed;
  box-shadow: 0 2px 5px 0 rgba(0, 0, 0, 0.2);
}
/* ↑プロフィール写真 */●3行目「position: absolute;」
先ほど出てきた3行目「position: relative;」とセットで使います。
4行目「left: 0;」〜6行目「bottom: -35%;」で、プロフィール写真の位置を指定しています。
(※今のままだと、作者名(「はるか」の部分)にプロフィール写真が重なっていますので、後ほど調整します。)
「position: relative;」と「position: absolute;」の使い方については、ナビゲーションメニューのカスタマイズ記事の「3.4 副項目の左側に「▶︎」を付ける」でも説明していますので、よければそちらもご覧ください。
その他のCSSについて簡単に説明すると、
●「width」「max-width」…写真の幅を指定
●「margin: 0 auto;」…写真を中央に
●「border: 3px solid #fdf2ed;」…写真の周りに #fdf2ed(サイト背景色と同じ色)の線
●「box-shadow」…写真の周りに影をつける
このようになります。
テキスト部分のカスタマイズ
上部の余白を大きく
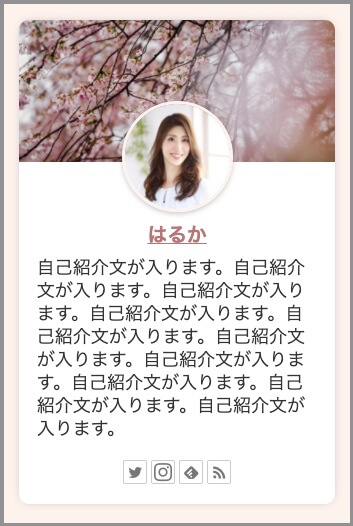
/* ↓↓テキスト部分・SNSボタン */
.author-box .author-content {
  margin-top: 13% !important;
}テキスト部分の上部の余白を大きくして、作者名(「はるか」の部分)が見えるようにしました。
作者名
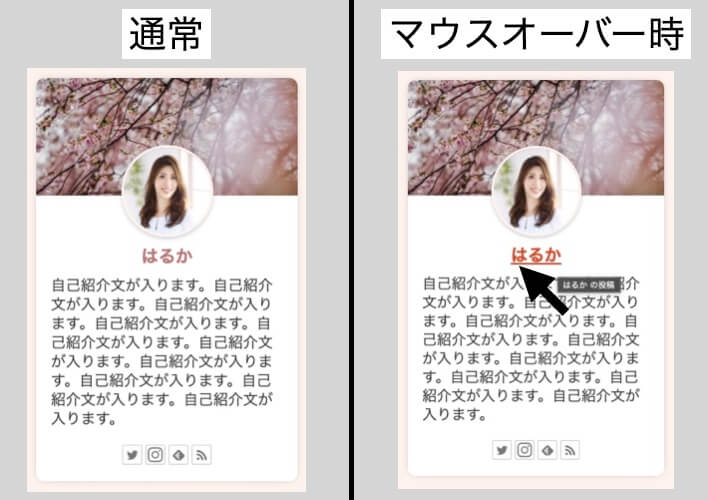
/*↓作者名(「はるか」の部分) */
.author-box .author-content .author-name {
  text-align: center;
  font-size: 1.3rem;
}

.author-box .author-content .author-name a {
  text-decoration: none;
}

.author-box .author-content .author-name a:hover {
  text-decoration: underline;
}
/*↑作者名(「はるか」の部分) */
●文字サイズをカスタマイズ(少し大きめに)
●通常時は下線なし
●マウスオーバー時に下線が現れる
以上のようなカスタマイズにしています。
プロフィール文
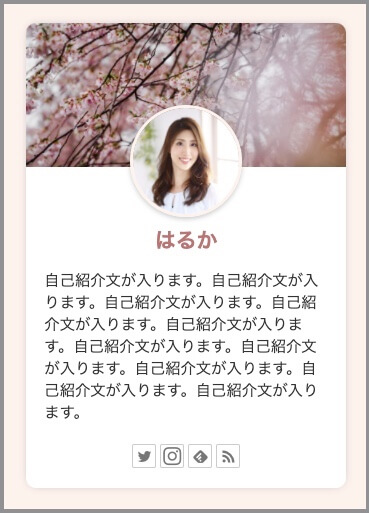
/*↓プロフィール文 */
.author-box .author-content .author-description p {
  max-width: 500px;
  margin: 1em auto;
  line-height: 1.5 !important;
  font-size: 85%;
}
/*↑プロフィール文 */「自己紹介文が入ります。」部分の文字サイズを少し小さくして、作者名との違いを分かりやすくしています。
このあたりはお好みでどうぞ。
SNSボタンのカスタマイズ
ボタンの形など
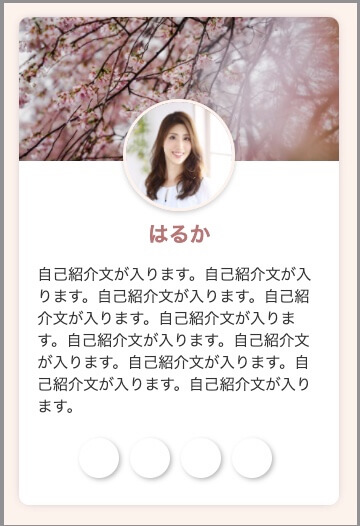
/* ↓SNSボタン 形など*/
.author-box .author-follows .sns-buttons a.follow-button {
  border-radius: 50%;
  box-shadow: 2px 2px 5px 0 rgba(0, 0, 0, 0.3);
  width: 40px;
  height: 40px;
  margin-bottom: .5em;
  margin-right: .5em;
  border: none;
  color: white;
}
/* ↑SNSボタン 形など*/
ポイントとなる部分は、
●「border-radius: 50%;」…円形にする
●「box-shadow」…影をつける
●「color: white;」…中のアイコンを白色にする
です。
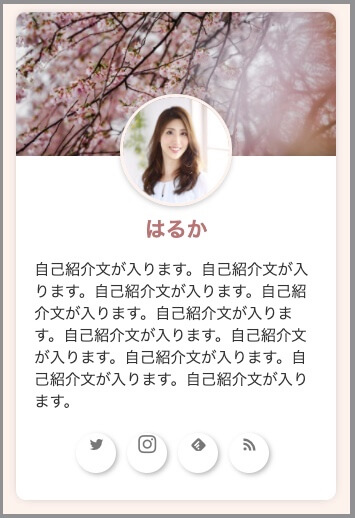
このままだと、ボタン全体が真っ白で中のアイコンの様子が分からないので、説明の都合上、中のアイコンは色を付けたままで解説していきますね。
色を付けると、中のアイコンはこんな感じになっています↓↓
マウスオーバー時の動き
/* ↓マウスオーバー時の動き */
.author-box .author-follows .sns-buttons a.follow-button:hover {
  box-shadow: 0;
  transform: translateY(-2px);
  transition: all .3s ease;
}
/* ↑マウスオーバー時の動き */マウスオーバーした時に、ボタンをふわっと浮き上がらせます。
「transform」や「transition」に関しては、記事一覧のカスタマイズ記事の「3.1 記事をふわっと浮き上がらせ、影を濃くする」で説明していますので、必要な方はそちらをご覧ください。
中のアイコン
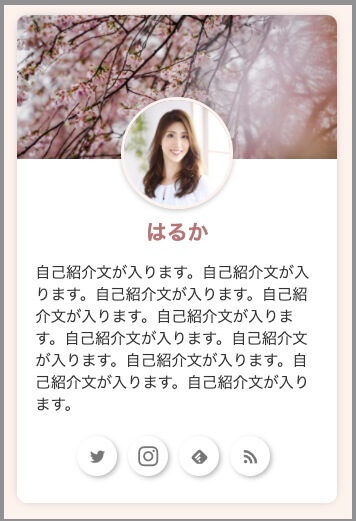
/* ↓SNSボタン 中のアイコン */
.author-box .author-follows .sns-buttons a.follow-button span {
  line-height: 40px;
}

.author-box .author-follows .sns-buttons a.follow-button span::before {
  font-size: 20px !important;
}
/* ↑SNSボタン 中のアイコン */「line-height」行の高さをカスタマイズして、アイコンの位置を調整します。
また、「font-size」でアイコンの大きさを調整(少し大きく)しています。
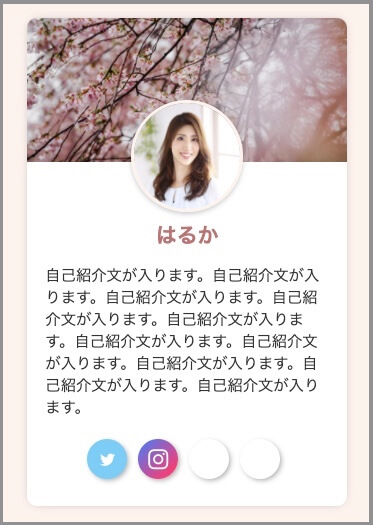
背景色
/* ↓SNSボタン 背景色 */
.author-box .bc-brand-color.sns-follow .twitter-button {
  background-color: #7dcdf7 !important;
}

.author-box .bc-brand-color.sns-follow .github-button {
  background-color: #4078c0 !important;
}

.author-box .bc-brand-color.sns-follow .facebook-button {
  background-color: #7c9dec !important;
}

.author-box .bc-brand-color.sns-follow .hatebu-button {
  background-color: #2c6ebd !important;
}

.author-box .bc-brand-color.sns-follow .instagram-button {
  background: linear-gradient(135deg, #427eff 0%, #f13f79 80%) no-repeat !important;
}

.author-box .bc-brand-color.sns-follow .line-button {
  background-color: #00c300 !important;
}

.author-box .bc-brand-color.sns-follow .website-button {
  background-color: #6eb6fd !important;
}

.author-box .bc-brand-color.sns-follow .youtube-button {
  background-color: #cd201f !important;
}
/* ↑SNSボタン 背景色 */プロフィールボックスに表示できる全てのSNSボタンの背景色を設定しています。
(背景色を設定したので、中のアイコンの色は白に戻しました。)
このままコピペしてもらってもいいですし、自分が表示させるSNSボタンの分だけコピペして使って頂いても構いません。
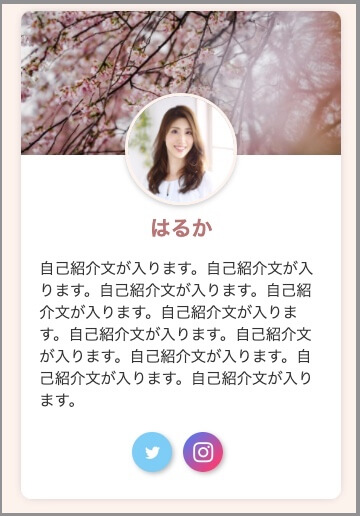
デフォルトで表示される「Feedly」ボタンと「RSS」ボタンを非表示
/* ↓デフォルトで表示される「Feedly」ボタンと「RSS」ボタンを非表示 */
.author-box .bc-brand-color.sns-follow .feedly-button, .author-box .bc-brand-color.sns-follow .rss-button {
  display: none;
}
「Feedly」ボタンと「RSS」ボタン、私はいらないので非表示にしました。
これで、プロフィールボックスのカスタマイズは完成です!
プロフィールボックスのカスタマイズについては、またまたリスブロさんの記事を参考にさせて頂きました↓↓
以上のカスタマイズをして、サイトは以下のような状態になりました。
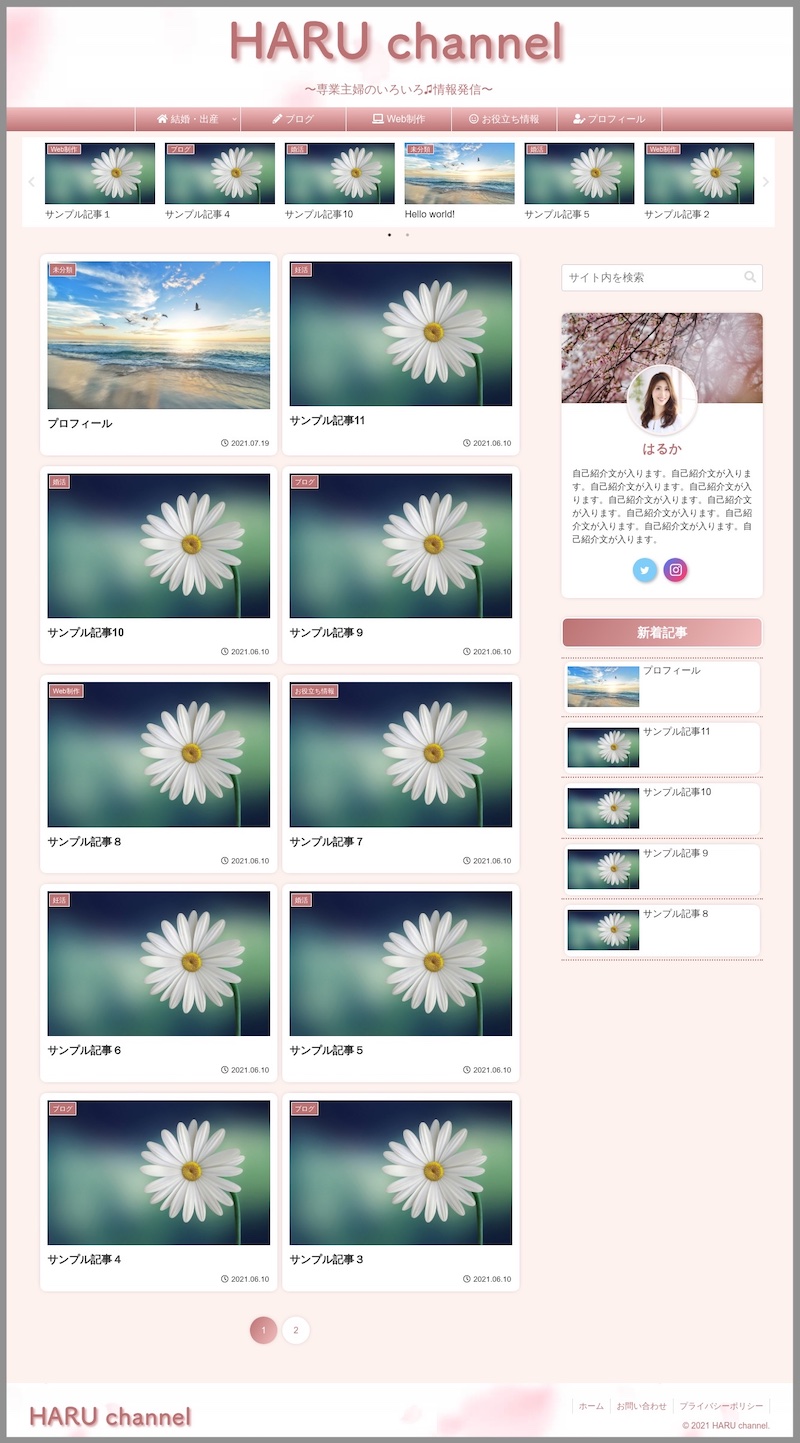
これで、サイドバー全体のカスタマイズは完成です!
プロフィールボックスも変わると、だいぶ華やかな印象になりましたね。
次回は、
- カルーセル
のCSSのカスタマイズ方法を解説します!



コメント